Appandus MyVIP » Merchant
How to login MyVIP Merchant Business App?
You must download MyVIP Merchant Business App from Google Play Store and must have Appandus MyVIP Admin account. To download MyVIP Merchant Business App, click here to install. To get your Appandus MyVIP Admin account, Visit Appandus MyVIP's enquiry to write an enquiry to us.
Note: IOS app is not available
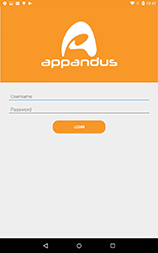
1. Enter your username and password, then press LOGIN. If you forget your password, please visit How to reset password?

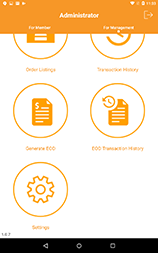
2. Enjoy with MyVIP Merchant Business App! Visit Getting Started: MyVIP Merchant Business App to start the journey.
Author: Administrator
Last update: 2020-03-24 10:49
Getting Started: MyVIP Merchant Business App
To get started, make sure you had downloaded MyVIP Merchant Business App and visited How to login MyVIP Merchant Business App?
Top-up Member's credit


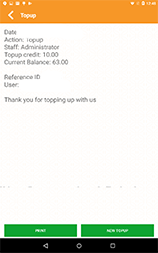
1.Tap Topup
2. Enter amount, press Clear to reset amount
3. Tap QR Code to scan member's QR
4. If topup member's credit success, then go to 3rd screen like 3rd picture above. Press Print button to print receipt. Press New Topup to run new top-up member's credit.
Author: Administrator
Last update: 2020-03-18 02:37
Appandus MyVIP » Merchant » Account
How to reset password?
1. In Appandus MyVIP Admin, click Forgot Your Password? Or you can visit Here
2. Enter your email and check  to start verify yourself like this

3. Once  , then click
  . It will inform you that we have e-mailed your password reset link!
4. Check your email account. You should have received a message containing Reset Password Button and password reset link like this .png)
5. Click  or the URL
6. Enter email, password, password confirmation, then click  . You will be redirecting to dashboard if password reset successful.
Author: Administrator
Last update: 2020-03-18 02:39
How to edit your account detail?
To edit your name
- In Appandus MyVIP Admin Dashboard, press your username or avatar at upper right corner > Setting.
- Select Name and enter your new name.
- Press
 to save your changes. If you want to view / Continue creating / Continue editing later on, check one of them > .
To edit your avatar
- In Appandus MyVIP Admin Dashboard, press your username or avatar at upper right corner > Setting.
- Select Avatar and click
 to choose photo you want.
- The avatar dimensions is minimum 128 * 128 pixels
- Press to save your changes. If you want to view / Continue creating / Continue editing later on, check one of them > .
To change your password
- In Appandus MyVIP Admin Dashboard, press your username or avatar at upper right corner > Setting.
- Select Password, enter new Password and Password confirmation.
- Password must same with Password confirmation.
- Press to save your changes. If you want to view / Continue creating / Continue editing later on, check one of them > .
Author: Administrator
Last update: 2020-01-16 10:52
How to Login to Appandus MyVIP Admin?

1. Visit https://myvip.appandus.com.my/admin/ .
2. Enter your username and password. Click Forgot Your Password? if you lost your password.
3. Click  to login, you will be redirect to Dashboard (Merchant) like what you see as sample image below


This error message mean that you entered wrong username and password
Author: Administrator
Last update: 2020-07-09 04:08
Appandus MyVIP » Merchant » General
Where is my business QR Code?
You can find your bussiness QR Code like this in Appandus MyVIP Admin dashboard


Author: Administrator
Last update: 2020-03-18 02:39
How to update MyVIP Business Merchant App?
You can easily update MyVIP Business Merchant App from your phone's application store. We encourage you to always use the latest version of MyVIP Business Merchant App. Latest versions contain the newest features and bug fixes.
Android
Go to the Google Play Store and search for MyVIP Business Merchant App. Tap Update next to MyVIP Business Merchant App.
IOS
MyVIP Business Merchant App is not available.
Author: Administrator
Last update: 2020-01-16 10:55
How to change the language?
Appandus MyVIP Admin is available in 3 languages, which are Chinese (中文), English and Malay (Melayu).
- Click

- select language, then your browser will refresh
Author: Administrator
Last update: 2020-03-18 02:40
How to audit the changes of record?
Audit the changes of record is one of the useful feature in Appandus MyVIP Admin. When u edited certain data, the changes of data will be recorded. To do so, just click  at which row to audit the changes.
Author: Administrator
Last update: 2020-03-24 10:44
Table Grid Setting
To sort data in column
Click  at which column to sort the data.
To show or hide table column(s)
- Click

- Tick ✔ at which column you wish to show, untick at which column you wish to hide. Click
 if you wish to show all column.
- Click
 to proceed.
To change number of entries in table
- Scroll down to find

- Select Show, select which number of entries
- Number of entries only available in 10, 20, 30, 50 and 100
To see on previous/next page in table
- Scroll down to bottom
- Click
 to see previous page. Click
  to see next page. You can press which page number to skip a lot of entries.
To filter data in table
- Click
 .
.
- Fill up with the data. Click
 to reset all.
- Click
 to proceed.
Author: Administrator
Last update: 2020-01-17 03:38
How to View/Continue creating/Continue editing after submitting?
When you finished update record(s), you not only can view the record(s), but also continue editing or continue creating.
To view the record.
- Fill up data.
- tick ✔ View and click .
To continue editing
- Fill up data
- tick ✔ Continue editing and click .
To continue creating
- Fill up data
- tick ✔ Continue creating and click .
Author: Administrator
Last update: 2020-01-16 11:31
How to export record(s) to Excel
To export all to Excel.
- Click
 or Click
  , then click All
To export current page to Excel
- Change number of entries or choose page number. Visit Table Grib Setting for detail
- Click , then click Current page.
To export selected row to Excel
- Choose only one page number. Visit Table Grib Setting for detail
- tick ✔ at which row(s)
- Click , then click Selected row
- Note: You cannot select row on other page at the same time.
Author: Administrator
Last update: 2020-03-18 02:41
Appandus MyVIP » Merchant » Membership
How to help user reset his/her password?
To start by selecting a member
- Visit Membership Management
- Select member, and tick ✔ at

- When you see
 , click
  , Reset User Password
- Click
 to proceed, click
  to don't proceed.
- Select Password, enter Password and Password Confirmation. Click
 to reset both of Password and Password Confirmation.
- Password and Password Confirmation must same.
- Click
 to submit.
- If successful, you will see the following notification
.png)
To start by visiting Reset User's Password
- Select Email (Name), find member by entering member's name or member's email.
- Select Password, enter Password and Password Confirmation. Click to reset both of Password and Password Confirmation.
- Password and Password Confirmation must same.
- Click to submit.
- If successful, you will see the following notification
Author: Administrator
Last update: 2020-03-18 02:43
How to import members CSV file?
Before get started, You have to be familiar with the following spreadsheet table columns which are Seq, Name, Email, Password, Contact, Gender and Birthday. You may refer to the following description by click  or
or  , then

If you are new to prepare member CSV file, you may get the sample for reference by clicking DOWNLOAD/SAVE SAMPLE CSV in Import Members.
Assume your member CSV file is ready, make sure no empty record, which mean must be minimum one row of record and Table columns must be completely same as the fields above and wrong-spelling-free.
- click or , then
- Enter Batch Name. (Note: Batch Name is unique)
- Click Browse..., then select Transaction CSV file you want.
- Click Submit, and then wait for the result.
- If Import successfully, message will shown with number of members. like this

- If import failed, please check with your Member CSV file.
Author: Administrator
Last update: 2020-02-18 06:53
How can I send voucher to member that not seen for 3 months?
You must created Free gift to member Campaign in order to send campaign gift to members, campaign gift could be voucher, Credit - Fixed Amount, Stamp or Point. Visit Campaign Setup For Free Gift to Member to learn how to setup Free gift to member Campaign.
When you setup Free gift to member Campaign, make sure you choose Voucher in REWARD OF CAMPAIGN Step 3 of 6.
To send voucher to member that not seen for 3 months
- Visit Memberships Management, click
- On Last active at, select the date, which is subtract 3 months from present date, as the end date. Start date must be empty. Like this

- Click
 to get the list of members that not seen for 3 months.
- Select members, you will see

- click
 , Send campaign gift, then choose one Free gift to member Campaign, which reward type is voucher
- Click
 to send voucher
Author: Administrator
Last update: 2020-03-18 02:43
How do I tag a member to become ‘VIP’?
Before get start, you must have membership tags. You can check with sub-categories aka tags under "Membership Tags" in Categories Management. Please read How to create Membership tag to create Membership tag if you don't have membership tags. You may proceed How to Tag Member if you are ready to tag members with exists membership tags.
How to create Membership tags? (with example create "VIP" tag)
- Visit Categories Management
- Enter Name, Description and Sorting Sequence.
For example, Enter "VIP" as Name, "Extra rebate membership" as Description
- Name is require. Enter any special pretty name-tag you want. For example, VIP, Ladies, Senior etc
- Description is optional.
- Sorting Sequence is optional. Enter large number for high priority.
- On Parent Category, Choose Membership Tags
- Click
 to finish membership tag setup. Click
  to reset.
How to Tag Member? (with example tag member to become "VIP")
- Visit Memberships Management
- Select at least one member(s)
- Click
 ,
, 
- On Choose tag, select a exists tag.
For example, select "VIP".
- Click
 to confirm tag the members with a exists name-tag. Click to cancel.
- Finally, Click
 if you see tag added!
Author: Administrator
Last update: 2020-03-18 10:45
How do I know how many members use the system for pass a month?
To check number of members used the system for pass a month in Membership Management
- Visit Membership Management, Click

- On Last active at, choose first day of month as starting date and last day of next month as end date. Like this

- On Status, Choose Active
- Click
 , to get list of memberships in this result.
- Then look for number of entries at below, it would be number of members used the system for pass a month.

Author: Administrator
Last update: 2020-03-24 07:30
How to import members tags?
Before get started, You have to be familiar with the following spreadsheet table columns which are Seq, and User_id. You may refer to the following description by click or , then 

If you are new to prepare member CSV file, you may get the sample for reference by clicking DOWNLOAD/SAVE SAMPLE CSV in Import Members.
Assume your member CSV file is ready, make sure no empty record, which mean must be minimum one row of record and Table columns must be completely same as the fields above and wrong-spelling-free.
- click or ,then
- On Tag, choose only one. (Note: Tag is unique)
- On Tag Members File, Click Browse..., then select one Tag-members CSV file you want.
- Click Submit, and then wait for the result.
- If Import successfully, message will shown with number of members tagged. Like this

- If import failed, please check with your Tag-members CSV file.
Author: Administrator
Last update: 2020-03-24 12:31
Appandus MyVIP » Merchant » Campaign
Campaign Setup for sign up as new member to get rewarded (Member registration)
Let say, you wish your new members get vouchers, stamps, points or credit for free when they just signed up. If you are going to run the campaign for giving new members the gift, so you are right here to follow the steps to create Member Registration campaign.
- Visit Campaign Management, click
 .
.
- Select Campaign Type, choose Member registration. Enter name in Campaign Name field. Choose date time range you prefer in Start - End Date Time Range . Then, Click
 .
.
- Campaign Type, Campaign Name and Start - End Date Time Range are required.
- If you see Selected Member registration, you may skip this step by click next, then click .
- To decide what gift goes to new member, Choose Vouchers, Credit - Fixed Amount, Stamps or Points. Click if you done the following instruction:
- To choose vouchers, you can select any Voucher Type, then enter Product Barcode, Vouchers value depend on your preference. You can skip it by click .
- To choose Credit - Fixed Amount, enter Amount of Credit - Fixed. Amount of Credit - Fixed is required, must greater than or equal to 0.1, and accept two decimals place.
- To choose Credit - Stamps, enter Number of stamp. Number of stamp is required, must greater than or equal to 1, and no deceimal places.
- To choose Points, enter Amount of Points. Amount of Points is required, must greater than or equal to 0.1, and accept two decimals place.
- Enter Reward limit, number count of reward will be given. Click to proceed next step.
- Enter 0 if you wish no limit count of reward will be given
- Reward limit is required.
- Select Reward expire, choose the type of reward expire. Click if you done the following instruction.
- To choose Same as this campaign's expiry, you will be prompted that the reward you selected expire datetime, this expire datetime is refer to end of Start - End Date Time Range. Like this

- To choose Absolute Fixed date/time value, select Reward Expiry Date then select datetime you want.
- To choose Reward expire in X minute(s), enter minute. For example, if you wish the member must use the reward you selected within 3 minutes, then enter 3.
- To choose Reward expire in X hour(s), enter hour. For example, if you wish the member must use the reward you selected within 6 hours, then enter 6.
- To choose Reward expire in X day(s), enter day. For example, if you wish the member must use the reward you selected within 3 days, then enter 3.
- To choose Reward expire in X month(s), enter month. For example, if you wish the member must use the reward you selected within 6 months, then enter 6.
- To choose Reward expire in X year(s), enter year. For example, if you wish the member must use the reward you selected within 2 years, then enter 2.
- Show Publicly, switch to
 if you wish to annouce publicly, or
  if you don't.
- Enter Post Title if you wish to customize title of campaign annoucement.
- To upload Posting Image, click
 to choose an image.
- Image must be dimension of 600px * 300px
- Write Post Content to describe about the campaign.
Finally, before you submit, you can double check again, to do so, click  to previous steps to change anything that you missed out, click to proceed next steps. Click
  to submit.
Author: Administrator
Last update: 2020-03-18 06:20
Setup referral campaigns (Refer-a-friend)
To reward member and his/her friends, you going to encourage members to invite their friend to sign up as member. So you are right here to follow the steps to create Refer-a-friend campaign. If you going to run the campaign for reward new member only, Visit How to setup campaigns (Member Registration)?
- Visit Campaign Management, click .
- Select Campaign Type, choose Refer-a-friend. Enter name in Campaign Name field. Choose date time range you prefer in Start - End Date Time Range . Then, Click .
- If you see Selected Refer-a-Friend, you may skip this step by click next, then click ., then click .
- To decide what gift goes to member and his/her friends, Choose Vouchers, Credit - Fixed Amount, Stamps or Points. Click if you done the following instruction:
- To choose vouchers, enter Coupon Code. You can igrone if you don't have.
- To choose Credit - Fixed Amount, enter Amount of Credit - Fixed. Amount of Credit - Fixed is required, must greater than or equal to 0.1, and accept two decimals place.
- To choose Credit - Stamps, enter Number of stamp. Number of stamp is required, must greater than or equal to 1, and no deceimal places.
- To choose Points, enter Amount of Points. Amount of Points is required, must greater than or equal to 0.1, and accept two decimals place.
- Enter Reward limit, number count of reward will be given. Click to proceed next step.
- Enter 0 if you wish no limit count of reward will be given
- Reward limit is required.
- Select Reward expire, choose the type of reward expire. Click if you done the following instruction.
- To choose Same as this campaign's expiry, you will be prompted that the reward you selected expire datetime, this expire datetime is refer to end of Start - End Date Time Range. Like this
- To choose Absolute Fixed date/time value, select Reward Expiry Date then select datetime you want.
- To choose Reward expire in X minute(s), enter minute. For example, if you wish the member must use the reward you selected within 3 minutes, then enter 3.
- To choose Reward expire in X hour(s), enter hour. For example, if you wish the member must use the reward you selected within 6 hours, then enter 6.
- To choose Reward expire in X day(s), enter day. For example, if you wish the member must use the reward you selected within 3 days, then enter 3.
- To choose Reward expire in X month(s), enter month. For example, if you wish the member must use the reward you selected within 6 months, then enter 6.
- To choose Reward expire in X year(s), enter year. For example, if you wish the member must use the reward you selected within 2 years, then enter 2.
- Show Publicly, switch to if you wish to annouce publicly, or if you don't.
- Enter Post Title if you wish to customize title of campaign annoucement.
- To upload Posting Image, click to choose an image.
- Image must be dimension of 600px * 300px
- Write Post Content to describe about the campaign.
Finally, before you submit, you can double check again, to do so, click to previous steps to change anything that you missed out, click to proceed next steps. Click to submit.
Author: Administrator
Last update: 2020-01-17 10:05
Campaign Setup For Top-up Credits to Get One Reward
This Topup Credit at Cashier campaign setup steps by steps is for have only one time to receive rewards in the result of fulfill criterias of top up credits. To understand what is Topup credit at cashier Campaign, please visit What is Topup credit at cashier Campaign.
- Visit Campaign Management, click .
- Select Campaign Type, choose Topup credit at cashier. Enter name in Campaign Name field. Choose date time range you prefer in Start - End Date Time Range . Then, click .
- Enter Trigger value in Credit/Stamp/Point. For example, if member top-up at least 20.00 can get rewarded, then enter 20.00.
At Which one of the frequency with which users receive this campaign offer?, select Once per campaign. Then click .
- Trigger value in Credit/Stamp/Point must be greater than or equal to 1 and can accept two decimals place.
- To choose Once per campaign, no need answer How many times does user to participate this campaign?
- Choose Vouchers, Credit - Fixed Amount, Credit % of Amount, Stamps or Points as reward. Click if you done the following instruction:
- To choose vouchers, enter Coupon Code. You can igrone if you don't have.
- To choose Credit - Fixed Amount, enter Amount of Credit - Fixed. Amount of Credit - Fixed is required, must greater than or equal to 0.1, and accept two decimals place.
- To choose Credit - % of Amount, enter Amount of Credit (%). Amount of Credit (%) is required, must greater than or equal to 0.1, and accept two decimals place.
- To choose Stamps, enter Number of stamp. Number of stamp is required, must greater than or equal to 1, and no deceimal places.
- To choose Points, enter Amount of Points. Amount of Points is required, must greater than or equal to 0.1, and accept two decimals place.
- Enter Reward limit, number count of reward will be given. Click to proceed next step.
- Enter 0 if you wish no limit count of reward will be given
- Reward limit is required.
- Select Reward expire, choose the type of reward expire. Click if you done the following instruction.
- To choose Same as this campaign's expiry, you will be prompted that the reward you selected expire datetime, this expire datetime is refer to end of Start - End Date Time Range. Like this
- To choose Absolute Fixed date/time value, select Reward Expiry Date then select datetime you want.
- To choose Reward expire in X minute(s), enter minute. For example, if you wish the member must use the reward you selected within 3 minutes, then enter 3.
- To choose Reward expire in X hour(s), enter hour. For example, if you wish the member must use the reward you selected within 6 hours, then enter 6.
- To choose Reward expire in X day(s), enter day. For example, if you wish the member must use the reward you selected within 3 days, then enter 3.
- To choose Reward expire in X month(s), enter month. For example, if you wish the member must use the reward you selected within 6 months, then enter 6.
- To choose Reward expire in X year(s), enter year. For example, if you wish the member must use the reward you selected within 2 years, then enter 2.
- Show Publicly, switch to if you wish to annouce publicly, or if you don't.
- Enter Post Title if you wish to customize title of campaign annoucement.
- To upload Posting Image, click to choose an image.
- Image must be dimension of 600px * 300px
- Write Post Content to describe about the campaign.
Finally, before you submit, you can double check again, to do so, click to previous steps to change anything that you missed out, click to proceed next steps. Click to submit.
Author: Administrator
Last update: 2020-01-20 07:43
Campaign Setup for Multiple Times Top up credits to Get Rewarded (Transaction or Action)
This Topup Credit at Cashier campaign setup steps by steps is for members have multiple times to receive rewards in the result of fulfill criterias of top up credits. To understand what is Topup credit at cashier Campaign, please visit What is Topup credit at cashier Campaign.
- Visit Campaign Management, click .
- Select Campaign Type, choose Topup credit at cashier. Enter name in Campaign Name field. Choose date time range you prefer in Start - End Date Time Range . Then, click .
- Enter Trigger value in Credit/Stamp/Point. For example, if member top-up at least 20.00 can get rewarded, then enter 20.00.
At Which one of the frequency with which users receive this campaign offer?, select Transaction or Action. Then click if you done the following instruction:
- Trigger value in Credit/Stamp/Point must be greater than or equal to 1 and can accept two decimals place.
- To choose Transaction or Action, need answer "How many times does user to participate this campaign?". For example, If member have 2 times to top up credits to get rewarded, then enter 2.
- Choose Vouchers, Credit - Fixed Amount, Credit % of Amount, Stamps or Points as reward. Click if you done the following instruction:
- To choose vouchers, enter Coupon Code. You can igrone if you don't have.
- To choose Credit - Fixed Amount, enter Amount of Credit - Fixed. Amount of Credit - Fixed is required, must greater than or equal to 0.1, and accept two decimals place.
- To choose Credit - % of Amount, enter Amount of Credit (%). Amount of Credit (%) is required, must greater than or equal to 0.1, and accept two decimals place.
- To choose Stamps, enter Number of stamp. Number of stamp is required, must greater than or equal to 1, and no deceimal places.
- To choose Points, enter Amount of Points. Amount of Points is required, must greater than or equal to 0.1, and accept two decimals place.
- Enter Reward limit, number count of reward will be given. Click to proceed next step.
- Enter 0 if you wish no limit count of reward will be given
- Reward limit is required.
- Select Reward expire, choose the type of reward expire. Click if you done the following instruction.
- To choose Same as this campaign's expiry, you will be prompted that the reward you selected expire datetime, this expire datetime is refer to end of Start - End Date Time Range. Like this
- To choose Absolute Fixed date/time value, select Reward Expiry Date then select datetime you want.
- To choose Reward expire in X minute(s), enter minute. For example, if you wish the member must use the reward you selected within 3 minutes, then enter 3.
- To choose Reward expire in X hour(s), enter hour. For example, if you wish the member must use the reward you selected within 6 hours, then enter 6.
- To choose Reward expire in X day(s), enter day. For example, if you wish the member must use the reward you selected within 3 days, then enter 3.
- To choose Reward expire in X month(s), enter month. For example, if you wish the member must use the reward you selected within 6 months, then enter 6.
- To choose Reward expire in X year(s), enter year. For example, if you wish the member must use the reward you selected within 2 years, then enter 2.
- Show Publicly, switch to if you wish to annouce publicly, or if you don't.
- Enter Post Title if you wish to customize title of campaign annoucement.
- To upload Posting Image, click to choose an image.
- Image must be dimension of 600px * 300px
- Write Post Content to describe about the campaign.
Finally, before you submit, you can double check again, to do so, click to previous steps to change anything that you missed out, click to proceed next steps. Click to submit.
Author: Administrator
Last update: 2020-01-20 07:52
Campaign Setup for Multiple Times Top up credits to Get Rewarded (Multiple of RMXX)
For Multiple of RMXX, think of certain amount of credit for top-up, member will have multiple times to receive multiple of rewarded in the result of fulfill criterias of top up multiple of certain amount of credit. Visit Campaign Setup for Multiple Times Top up credits to Get Rewarded (Transaction or Action) for only top up certain amount of credit to get rewarded. To understand what is Topup credit at cashier Campaign, please visit What is Topup credit at cashier Campaign.
- Visit Campaign Management, click .
- Select Campaign Type, choose Topup credit at cashier. Enter name in Campaign Name field. Choose date time range you prefer in Start - End Date Time Range . Then, click .
- Enter Trigger value in Credit/Stamp/Point. For example, if member top-up at least 20.00 can get rewarded, then enter 20.00.
At Which one of the frequency with which users receive this campaign offer?, select Multiple of RMXX. Then click if you done the following instruction:
- Trigger value in Credit/Stamp/Point must be greater than or equal to 1 and can accept two decimals place.
- To choose Multiple of RMXX, need answer "How many times does user to participate this campaign?". For example, If member have 2 times to top up credits to get rewarded, then enter 2.
- Choose Vouchers, Credit - Fixed Amount, Credit % of Amount, Stamps or Points as reward. Click if you done the following instruction:
- To choose vouchers, enter Coupon Code. You can igrone if you don't have.
- To choose Credit - Fixed Amount, enter Amount of Credit - Fixed. Amount of Credit - Fixed is required, must greater than or equal to 0.1, and accept two decimals place.
- To choose Credit - % of Amount, enter Amount of Credit (%). Amount of Credit (%) is required, must greater than or equal to 0.1, and accept two decimals place.
- To choose Stamps, enter Number of stamp. Number of stamp is required, must greater than or equal to 1, and no deceimal places.
- To choose Points, enter Amount of Points. Amount of Points is required, must greater than or equal to 0.1, and accept two decimals place.
- Enter Reward limit, number count of reward will be given. Click to proceed next step.
- Enter 0 if you wish no limit count of reward will be given
- Reward limit is required.
- Select Reward expire, choose the type of reward expire. Click if you done the following instruction.
- To choose Same as this campaign's expiry, you will be prompted that the reward you selected expire datetime, this expire datetime is refer to end of Start - End Date Time Range. Like this
- To choose Absolute Fixed date/time value, select Reward Expiry Date then select datetime you want.
- To choose Reward expire in X minute(s), enter minute. For example, if you wish the member must use the reward you selected within 3 minutes, then enter 3.
- To choose Reward expire in X hour(s), enter hour. For example, if you wish the member must use the reward you selected within 6 hours, then enter 6.
- To choose Reward expire in X day(s), enter day. For example, if you wish the member must use the reward you selected within 3 days, then enter 3.
- To choose Reward expire in X month(s), enter month. For example, if you wish the member must use the reward you selected within 6 months, then enter 6.
- To choose Reward expire in X year(s), enter year. For example, if you wish the member must use the reward you selected within 2 years, then enter 2.
- Show Publicly, switch to if you wish to annouce publicly, or if you don't.
- Enter Post Title if you wish to customize title of campaign annoucement.
- To upload Posting Image, click to choose an image.
- Image must be dimension of 600px * 300px
- Write Post Content to describe about the campaign.
Finally, before you submit, you can double check again, to do so, click to previous steps to change anything that you missed out, click to proceed next steps. Click to submit.
Author: Administrator
Last update: 2020-01-20 08:49
What is Topup Credit in Cashier Campaign?
Think of certain amount of credit for top-up. Member get rewarded in the result of fulfill criterias of top up credits. For example, member top up 30.00 credits will get three vouchers, extra 10 credits or 10 points for free.
Before get start to setup top-up campaign, Let talk about the following types of the frequency with which members receive this campaign offer.
- Once per campaign, members have only one time to receive rewards in the result of fulfil criteria of top up credits, and they will not get rewarded in the result of the next time top up credits. Visit Campaign Setup For Top-up Credits to Get One Reward to follow this steps to setup.
- Transaction or Action, members have multiple times to receive rewards in the result of fulfil criteria of top up credits. Visit Campaign Setup for Multiple Times Top up credits to Get Rewarded (Transaction or Action) to follow this steps to setup.
- Multiple of RMXX, members have multiple times to receive multiple of rewarded in the result of fulfill criterias of top up multiple of certain amount of credit. Visit Campaign Setup for Multiple Times Top up credits to Get Rewarded (Multiple of RMXX) to follow this steps to setup.
Author: Administrator
Last update: 2020-01-20 07:10
What is Spend Credits at Cashier Campaign?
Think of certain amount of credit for spend. Member get rewarded in the result of fulfill criterias of spend credits. For example, member spend 30.00 credits will get three vouchers, extra 10 credits or 10 points for free.
Before get start to setup spend campaign, Let talk about the following types of the frequency with which members receive this campaign offer.
- Once per campaign, members have only one time to receive rewards in the result of fulfil criteria of spend credits, and they will not get rewarded in the result of the next time spend credits. Visit Campaign Setup For Spend Credits to Get One Reward to follow this steps to setup.
- Transaction or Action, members have multiple times to receive rewards in the result of fulfil criteria of top up credits. Visit Campaign Setup for Multiple Times Spend credits to Get Rewarded (Transaction or Action) to follow this steps to setup.
- Multiple of RMXX, members have multiple times to receive multiple of rewarded in the result of fulfill criterias of spend multiple of certain amount of credit. Visit Campaign Setup for Multiple Times Spend credits to Get Rewarded (Multiple of RMXX) to follow this steps to setup.
Author: Administrator
Last update: 2020-01-20 07:20
Campaign Setup For Spend Credits to Get One Reward
This Spend Credit at Cashier campaign setup steps by steps is for have only one time to receive rewards in the result of fulfill criterias of spend credits. To understand what is Spend credit at cashier Campaign, please visit What is Topup credit at cashier Campaign.
- Visit Campaign Management, click .
- Select Campaign Type, choose Spend credit at cashier. Enter name in Campaign Name field. Choose date time range you prefer in Start - End Date Time Range . Then, click .
- Enter Trigger value in Credit/Stamp/Point. For example, if member spend at least 20.00 can get rewarded, then enter 20.00.
At Which one of the frequency with which users receive this campaign offer?, select Once per campaign. Then click .
- Trigger value in Credit/Stamp/Point must be greater than or equal to 1 and can accept two decimals place.
- To choose Once per campaign, no need answer How many times does user to participate this campaign?
- Choose Vouchers, Credit - Fixed Amount, Credit % of Amount, Stamps or Points as reward. Click if you done the following instruction:
- To choose vouchers, enter Coupon Code. You can igrone if you don't have.
- To choose Credit - Fixed Amount, enter Amount of Credit - Fixed. Amount of Credit - Fixed is required, must greater than or equal to 0.1, and accept two decimals place.
- To choose Credit - % of Amount, enter Amount of Credit (%). Amount of Credit (%) is required, must greater than or equal to 0.1, and accept two decimals place.
- To choose Stamps, enter Number of stamp. Number of stamp is required, must greater than or equal to 1, and no deceimal places.
- To choose Points, enter Amount of Points. Amount of Points is required, must greater than or equal to 0.1, and accept two decimals place.
- Enter Reward limit, number count of reward will be given. Click to proceed next step.
- Enter 0 if you wish no limit count of reward will be given
- Reward limit is required.
- Select Reward expire, choose the type of reward expire. Click if you done the following instruction.
- To choose Same as this campaign's expiry, you will be prompted that the reward you selected expire datetime, this expire datetime is refer to end of Start - End Date Time Range. Like this
- To choose Absolute Fixed date/time value, select Reward Expiry Date then select datetime you want.
- To choose Reward expire in X minute(s), enter minute. For example, if you wish the member must use the reward you selected within 3 minutes, then enter 3.
- To choose Reward expire in X hour(s), enter hour. For example, if you wish the member must use the reward you selected within 6 hours, then enter 6.
- To choose Reward expire in X day(s), enter day. For example, if you wish the member must use the reward you selected within 3 days, then enter 3.
- To choose Reward expire in X month(s), enter month. For example, if you wish the member must use the reward you selected within 6 months, then enter 6.
- To choose Reward expire in X year(s), enter year. For example, if you wish the member must use the reward you selected within 2 years, then enter 2.
- Show Publicly, switch to if you wish to annouce publicly, or if you don't.
- Enter Post Title if you wish to customize title of campaign annoucement.
- To upload Posting Image, click to choose an image.
- Image must be dimension of 600px * 300px
- Write Post Content to describe about the campaign.
Finally, before you submit, you can double check again, to do so, click to previous steps to change anything that you missed out, click to proceed next steps. Click to submit.
Author: Administrator
Last update: 2020-01-20 08:32
Campaign Setup for Multiple Times Spend credits to Get Rewarded (Transaction or Action)
This Spend Credit at Cashier campaign setup steps by steps is for members have multiple times to receive rewards in the result of fulfill criterias of spend credits. To understand what is Topup credit at cashier Campaign, please visit What is Topup credit at cashier Campaign.
- Visit Campaign Management, click .
- Select Campaign Type, choose Spend credit at cashier. Enter name in Campaign Name field. Choose date time range you prefer in Start - End Date Time Range . Then, click .
- Enter Trigger value in Credit/Stamp/Point. For example, if member top-up at least 20.00 can get rewarded, then enter 20.00.
At Which one of the frequency with which users receive this campaign offer?, select Transaction or Action. Then click if you done the following instruction:
- Trigger value in Credit/Stamp/Point must be greater than or equal to 1 and can accept two decimals place.
- To choose Transaction or Action, need answer "How many times does user to participate this campaign?". For example, If member have 2 times to spend credits to get rewarded, then enter 2.
- Choose Vouchers, Credit - Fixed Amount, Credit % of Amount, Stamps or Points as reward. Click if you done the following instruction:
- To choose vouchers, enter Coupon Code. You can igrone if you don't have.
- To choose Credit - Fixed Amount, enter Amount of Credit - Fixed. Amount of Credit - Fixed is required, must greater than or equal to 0.1, and accept two decimals place.
- To choose Credit - % of Amount, enter Amount of Credit (%). Amount of Credit (%) is required, must greater than or equal to 0.1, and accept two decimals place.
- To choose Stamps, enter Number of stamp. Number of stamp is required, must greater than or equal to 1, and no deceimal places.
- To choose Points, enter Amount of Points. Amount of Points is required, must greater than or equal to 0.1, and accept two decimals place.
- Enter Reward limit, number count of reward will be given. Click to proceed next step.
- Enter 0 if you wish no limit count of reward will be given
- Reward limit is required.
- Select Reward expire, choose the type of reward expire. Click if you done the following instruction.
- To choose Same as this campaign's expiry, you will be prompted that the reward you selected expire datetime, this expire datetime is refer to end of Start - End Date Time Range. Like this
- To choose Absolute Fixed date/time value, select Reward Expiry Date then select datetime you want.
- To choose Reward expire in X minute(s), enter minute. For example, if you wish the member must use the reward you selected within 3 minutes, then enter 3.
- To choose Reward expire in X hour(s), enter hour. For example, if you wish the member must use the reward you selected within 6 hours, then enter 6.
- To choose Reward expire in X day(s), enter day. For example, if you wish the member must use the reward you selected within 3 days, then enter 3.
- To choose Reward expire in X month(s), enter month. For example, if you wish the member must use the reward you selected within 6 months, then enter 6.
- To choose Reward expire in X year(s), enter year. For example, if you wish the member must use the reward you selected within 2 years, then enter 2.
- Show Publicly, switch to if you wish to annouce publicly, or if you don't.
- Enter Post Title if you wish to customize title of campaign annoucement.
- To upload Posting Image, click to choose an image.
- Image must be dimension of 600px * 300px
- Write Post Content to describe about the campaign.
Finally, before you submit, you can double check again, to do so, click to previous steps to change anything that you missed out, click to proceed next steps. Click to submit.
Author: Administrator
Last update: 2020-01-20 08:31
Campaign Setup for Multiple Times Spend credits to Get Rewarded (Multiple of RMXX)
For Multiple of RMXX, think of certain amount of credit for spend, member will have multiple times to receive multiple of rewarded in the result of fulfill criterias of spend multiple of certain amount of credit. Visit Campaign Setup for Multiple Times Spend credits to Get Rewarded (Transaction or Action) for only spend certain amount of credit to get rewarded. To understand what is Spend credit at cashier Campaign, please visit What is Spend credit at cashier Campaign.
- Visit Campaign Management, click .
- Select Campaign Type, choose Spend credit at cashier. Enter name in Campaign Name field. Choose date time range you prefer in Start - End Date Time Range . Then, click .
- Enter Trigger value in Credit/Stamp/Point. For example, if member top-up at least 20.00 can get rewarded, then enter 20.00.
At Which one of the frequency with which users receive this campaign offer?, select Multiple of RMXX. Then click if you done the following instruction:
- Trigger value in Credit/Stamp/Point must be greater than or equal to 1 and can accept two decimals place.
- To choose Multiple of RMXX, need answer "How many times does user to participate this campaign?". For example, If member have 2 times to spend credits to get rewarded, then enter 2.
- Choose Vouchers, Credit - Fixed Amount, Credit % of Amount, Stamps or Points as reward. Click if you done the following instruction:
- To choose vouchers, enter Coupon Code. You can igrone if you don't have.
- To choose Credit - Fixed Amount, enter Amount of Credit - Fixed. Amount of Credit - Fixed is required, must greater than or equal to 0.1, and accept two decimals place.
- To choose Credit - % of Amount, enter Amount of Credit (%). Amount of Credit (%) is required, must greater than or equal to 0.1, and accept two decimals place.
- To choose Stamps, enter Number of stamp. Number of stamp is required, must greater than or equal to 1, and no deceimal places.
- To choose Points, enter Amount of Points. Amount of Points is required, must greater than or equal to 0.1, and accept two decimals place.
- Enter Reward limit, number count of reward will be given. Click to proceed next step.
- Enter 0 if you wish no limit count of reward will be given
- Reward limit is required.
- Select Reward expire, choose the type of reward expire. Click if you done the following instruction.
- To choose Same as this campaign's expiry, you will be prompted that the reward you selected expire datetime, this expire datetime is refer to end of Start - End Date Time Range. Like this
- To choose Absolute Fixed date/time value, select Reward Expiry Date then select datetime you want.
- To choose Reward expire in X minute(s), enter minute. For example, if you wish the member must use the reward you selected within 3 minutes, then enter 3.
- To choose Reward expire in X hour(s), enter hour. For example, if you wish the member must use the reward you selected within 6 hours, then enter 6.
- To choose Reward expire in X day(s), enter day. For example, if you wish the member must use the reward you selected within 3 days, then enter 3.
- To choose Reward expire in X month(s), enter month. For example, if you wish the member must use the reward you selected within 6 months, then enter 6.
- To choose Reward expire in X year(s), enter year. For example, if you wish the member must use the reward you selected within 2 years, then enter 2.
- Show Publicly, switch to if you wish to annouce publicly, or if you don't.
- Enter Post Title if you wish to customize title of campaign annoucement.
- To upload Posting Image, click to choose an image.
- Image must be dimension of 600px * 300px
- Write Post Content to describe about the campaign.
Finally, before you submit, you can double check again, to do so, click to previous steps to change anything that you missed out, click to proceed next steps. Click to submit.
Author: Administrator
Last update: 2020-01-20 08:34
Campaign Setup For Free Gift to Member
To send free gift to members, you going to run the campaign for giving exists members the gift. So you are right here to follow the steps to create Free gift to member campaign.
- Visit Campaign Management, click .
- Select Campaign Type, choose Free gift to member. Enter name in Campaign Name field. Choose date time range you prefer in Start - End Date Time Range . Then, Click .
- Campaign Type, Campaign Name and Start - End Date Time Range are required.
- Enter How many times does user to participate this campaign?, which is number of times the user can received the reward. For example, If member have two times to receive reward, then enter 2.
- Choose Vouchers, Credit - Fixed Amount, Stamps or Points as reward. Click if you done the following instruction:
- To choose vouchers, you can select any Voucher Type, then enter Product Barcode, Vouchers value depend on your preference. You can skip it by click .
- To choose Credit - Fixed Amount, enter Amount of Credit - Fixed. Amount of Credit - Fixed is required, must greater than or equal to 0.1, and accept two decimals place.
- To choose Stamps, enter Number of stamp. Number of stamp is required, must greater than or equal to 1, and no deceimal places.
- To choose Points, enter Amount of Points. Amount of Points is required, must greater than or equal to 0.1, and accept two decimals place.
- Enter Reward limit, number count of reward will be given. Click to proceed next step.
- Enter 0 if you wish no limit count of reward will be given
- Reward limit is required.
- Select Reward expire, choose the type of reward expire. Click if you done the following instruction.
- To choose Same as this campaign's expiry, you will be prompted that the reward you selected expire datetime, this expire datetime is refer to end of Start - End Date Time Range. Like this
- To choose Absolute Fixed date/time value, select Reward Expiry Date then select datetime you want.
- To choose Reward expire in X minute(s), enter minute. For example, if you wish the member must use the reward you selected within 3 minutes, then enter 3.
- To choose Reward expire in X hour(s), enter hour. For example, if you wish the member must use the reward you selected within 6 hours, then enter 6.
- To choose Reward expire in X day(s), enter day. For example, if you wish the member must use the reward you selected within 3 days, then enter 3.
- To choose Reward expire in X month(s), enter month. For example, if you wish the member must use the reward you selected within 6 months, then enter 6.
- To choose Reward expire in X year(s), enter year. For example, if you wish the member must use the reward you selected within 2 years, then enter 2.
- Show Publicly, switch to if you wish to annouce publicly, or if you don't.
- Enter Post Title if you wish to customize title of campaign annoucement.
- To upload Posting Image, click to choose an image.
- Image must be dimension of 600px * 300px
- Write Post Content to describe about the campaign.
Finally, before you submit, you can double check again, to do so, click to previous steps to change anything that you missed out, click to proceed next steps. Click to submit.
Author: Administrator
Last update: 2020-03-17 15:52
How do I give birthday voucher to members automatically?
Before give birthday voucher to members automatically, you must create Member birthday campaign in order to run birthday campaign. Make sure reward type of Member birthday campaign is voucher, So that any birthday voucher of Member birthday campaign that are running will be giving to birthday members. Read How to Create Member birthday campaign if you don't have. Read How Give Birthday Reward to Member Automatically to understand how is it work.
How to Create Member birthday campaign
- Visit Campaigns Management, then click
- Select Campaign Type, choose Member registration. Enter name in Campaign Name field. Choose date time range you prefer in Start - End Date Time Range . Then, Click .
- Campaign Type, Campaign Name and Start - End Date Time Range are required.
- If you see Selected Member birthday, you may skip this step by click next, then click .
- To decide what gift goes to new member, Choose Vouchers, Credit - Fixed Amount, Stamps or Points. Click if you done the following instruction:
- To choose vouchers, you can select any Voucher Type, then enter Product Barcode, Vouchers value depend on your preference. You can skip it by click .
- To choose Credit - Fixed Amount, enter Amount of Credit - Fixed. Amount of Credit - Fixed is required, must greater than or equal to 0.1, and accept two decimals place.
- To choose Credit - Stamps, enter Number of stamp. Number of stamp is required, must greater than or equal to 1, and no deceimal places.
- To choose Points, enter Amount of Points. Amount of Points is required, must greater than or equal to 0.1, and accept two decimals place.
- Enter Reward limit, number count of reward will be given. Click to proceed next step.
- Enter 0 if you wish no limit count of reward will be given
- Reward limit is required.
- Select Reward expire, choose the type of reward expire. Click if you done the following instruction.
- To choose Reward expire after last day of member birthday month, which mean reward will be expire on the first of next month.
- To choose Reward expire after X day(s) of member's birthday. Which mean reward will be expire on the next X day(s) of member's birthday. Enter day on Reward expire in X day(s)
- Show Publicly, switch to if you wish to annouce publicly, or if you don't.
- Enter Post Title if you wish to customize title of campaign annoucement.
- To upload Posting Image, click to choose an image.
- Image must be dimension of 600px * 300px
- Write Post Content to describe about the campaign.
- Finally, before you submit, you can double check again, to do so, click to previous steps to change anything that you missed out, click to proceed next steps. Click to submit.
How Give Birthday Reward to Member Automatically
When you have Member birthday campaigns, Your running Member birthday campaigns will be trigger automatically everyday. Meanwhile, your members who birthday month is now will receive birthday reward.
If reward type is your Member birthday Campaign is Reward expire after X day(s) of member's birthday, your members will receive birthday before X day(s) of his/her birthday.
If reward type is your Member birthday Campaign is Reward expire after last day of member birthday month, your members who birthday month is now will receive birthday reward onward.
If member's birthday is 14th March; register and join as member on 18 March. Will he/she get birthday reward Immediately or after one day ?
Immediately. But if let say he/she never fill up birthday on register form, and then fill up birthday in Edit Profile form, then he/she will receive birthday reward after one day.
Author: Administrator
Last update: 2020-03-25 08:12
How to give extra rebate for ‘VIP’ only?
Asume you had created "VIP" as example of membership tag and tag members to become "VIP". Visit How do I tag a member to become ‘VIP’? to learn how to create membership tags and how to tag member.
Of cause you need to run any campaigns that give members Credit % of Amount. Member registration campaign and Refer-a-friend campaign are not applicable. If fulfill the requirement and going to set Trigger Target Tags, read How to choose membership tag on Trigger Targeted Tags. To learn how to create campaigns, check this out here .
How to choose membership tag on Trigger Targeted Tags
- Visit Campaigns Management
- Select one campaign (except Member register campaign and Refer-a-friend campaign) to edit by click

- On Trigger Targeted Tags, select one membership tag. For example, select "VIP"
- Click
 to finsih edit campaign.
Finally, once you finished select membership tag on Trigger Targeted Tags, Your campaigns not only will be trigger, but also trigger your members with certain membership tag who are eligible to receive rewards. For example, trigger one Spend Credit at Cashier campaign, which offer 10% credit rebate to "VIP" members and must spend minimum 10, Meanwhile, those "VIP" members who spend more than 10 credit are engliable to receive 10% credit rebate.
Author: Administrator
Last update: 2020-03-18 13:08
Campaign Setup for Enter Coupon Code
Enter Coupon Code campaign is desire for members to get amount or percent of discount by enter voucher code, discount code or coupon code.
How to setup Enter Coupon Code campaign?
- To Visit Campaign Management, Click
 on leftside menu; you may expand leftside menu. Or if you are in Dashboard, click Campaigns button.
- On Campaign Management, Click
 visit create campaign page in new tab.
- On Step 1/6, Fill in Start - End Date Time Range and Campaign Name. On Campaign Type, Choose Enter Coupon Code.
- On Step 2/6, Fill in Coupon Code and How many times does user to participate this campaign? .
- Enter number of times the user enjoys this campaign offer on How many times does user to participate this campaign?
- On Step 3/6, Click Voucher and Choose one of the Voucher Types:
- Bill Discount - % : discount certain percent of entire total amount of receipt. Enter Voucher Value in percent
- Bill Discount - Amount: discount certain amount of entire total amount of receipt. Enter Voucher Value in amount
- Item Discount - %: discount certain percent of price of the specified product. Enter Voucher Value and Product SKU. Note: Product SKU must be exists with your Product resources in Product Management.
- Item Discount - Amount: discount certain amount of price of the specified product. Enter Voucher Value and Product SKU. Note: Product SKU must be exists with your Product resources in Product Management.
- On Step 4/6, Enter Total number of voucher count on Reward Limit. If enter 0, that's mean no voucher count limit.
- On Step 5/6, Select one of the Reward Expire.
- If select Same as this campaign's expire, Then expect voucher's expire date and time wil be shown at below.
- If select Absolute Fixed date/time value, Then you have to enter exact voucher's expire date and time below.
- On Step 6/6, Fill up Posting Content. Upload 600px * 300px of picture on Posting Image. Write up desire content on Posting Content.
- Show Publicly (Public): The posting will be shown publicly.
- Show Publicly (Private): The posting will be hidden.
Author: Administrator
Last update: 2020-08-06 09:00
How to update Campaign Posting detail
You must have Appandus MyVIP Admin account. To get your Appandus MyVIP Admin account, Visit Appandus MyVIP's enquiry to write an enquiry to us.
On Campaign Management, Click the  on Action column and click
  and there you go, you can update any details as stated bellow.
- Show Publicly? - Set Public to show posting content publicly in App. Otherwise set Private
- Posting title - title for the posting.
- Posting image - Image resolution must be 600 * 300.
- Posting Content - content for the posting.
- Posting published at - Set the date and time of publishing posting and posting being shown you prefer.

Author: Administrator
Last update: 2020-12-10 02:30
Appandus MyVIP » Merchant » Transaction
How to import transaction CSV file?
Before get started, You have to be familiar with the following spreadsheet table columns which are Seq, User_id, Type, Description, Local_time, Amount and Expiry_period. You may refer to the following description by click or , then  .
.

If you are new to prepare transaction CSV file, you may get the sample for reference by clicking DOWNLOAD/SAVE SAMPLE CSV in Import Transactions.
Assume your transaction CSV file is ready, make sure
- No empty record, which mean must be minimum one row of record.
- Table columns must be completely same as the fields above and wrong-spelling-free
- All of the user ids must be valid and joined as your member.
- click or , then
- Enter Batch Name. (Note: Batch Name is unique)
- Click Browse..., then select Transaction CSV file you want.
- Click Submit, and then wait for the result.
- If import successfully, message will be shown with number of transactions. like this

then, click For batch transactions to view imported transactions.
- If import failed, please check with your Tranasction CSV file.
Author: Administrator
Last update: 2020-02-18 06:52
How can I know who spend the most within this month?
- Visit Transaction Management, click
- On Type, choose Spend - Cashier.

- On Business date, select first day and last day of this month. For example,
This month is Feb, select 1 as first day , and 29 as last day of this month.

- On Status, choose OK - Success

- Think of minimum and maximum spend amount. On Amount, Enter minimum spend amount on left side, and maximum spend amount on right side. For example, 20 is minimum spend amount, and 100 is maximum spend amount.

- Click to search.
If going to check total spend amount of which member for fast accurate lookup. On User Id, enter user's id of which member.
Author: Administrator
Last update: 2020-02-26 03:26
How do I know who voided a members transaction?
- Visit Transactions Management
- To speedy search for void transactions, Choose Void on Status, filter transactions by ID, User Id ( refer to member who perform transaction) and so on. Then Click to get voided transactions in this result.
- On column Status / Reason, you will know which one of your staffs voided it by read at voided by staff's username. For example, voided by jayseafoods-admin
Author: Administrator
Last update: 2020-03-24 09:51
Appandus MyVIP » Merchant » Postings » Promotions
How I know how many people saw my promotion?
In Promotions Management , you can check with a table column named Views for each promotions. Views is represent number of view counting.
Author: Administrator
Last update: 2020-03-24 10:56
How do I know who / when change a promotion content?
To know who / when change a promotion content. assume you had learned How to audit the changes of record?. Visit Here for more detail.
- Visit Promotions Management
- Choose any one promotion, then click

- Look for who changed promotion content on column Changed by and when changed promotion content on column Updated At
Author: Administrator
Last update: 2020-03-24 10:55
Appandus MyVIP » Merchant » Reports » Vouchers
How I know how many member saw my voucher and not redeem it?
To Visit Report for Merchant Vouchers , Click  ,
,  . Then select Date range in Report for Merchant Vouchers
In Merchant Voucher Summary Chart, get number of member saw voucher and not redeem it by number of view voucher counting substract number of voucher given for each voucher.
 represent number of view voucher counting.
  represent number of voucher given.
 represent number of voucher used.
In Merchant Voucher Summary Table, get number of member saw voucher and not redeem it by Viewed substract Given for each voucher.
Author: Administrator
Last update: 2020-03-18 05:42
Appandus MyVIP » Merchant » Dashboard
How do I know how many users use the system for pass 24 hours?
Visit Dashboard or Click  or
or  , you will find the number of users using the system for pass 24 hours aka Number of actives user shown below Users in below 24 hours. For example, the number of users using the system for pass 24 hours.

Author: Administrator
Last update: 2020-03-24 07:02
How to view the form submitted by the customer ?

Visit Dashboard or Click or , Click  to see the forms submitted by the customer. Or you may visit https://myvip.appandus.com.my/admin/forms .

You will see list of forms like image above. To view form's detail, click  on Action column, For example, Click on form id 1 to see the detail.
Author: Administrator
Last update: 2020-07-09 03:56
How to know how many unread enquiries ?
Visit Dashboard or Click or .

On Menu Shortcuts. You will see a red dot with number of unread enquiry shown on Enquiries button, which mean there is an unread enquiry. So to check Enquiries. Click Enquiries button to see all enquiries.
Author: Administrator
Last update: 2020-07-09 03:50
Appandus MyVIP » Merchant » Message
How do I know how many members saw my push notifications?
- Visit Messages Management
- Choose any one of message, then click
 to view message or you can directly manual enter URL myvip.appandus.com.my/admin/messages/{message's id} in web browser.
- On Read vs Targeted, number of members readed / number of members received. For example, 2 members readed.

Author: Administrator
Last update: 2020-03-24 09:27
Appandus MyVIP » Merchant » Document
How to upload file ?
Visit Document

Or Visit Dashboard or Click or . Then click  to visit Document resource.

You will see this. Next, Click

Fill up the detail. On Document / Video, select file that you want to upload. Any file is acceptable. If you don't wish to key in version number of document, then enter 0 will do.

After that, Click to submit. You can choose to continue creating or continue editing or view after submit by tick one of them. Click to fill up detail.
Author: Administrator
Last update: 2020-07-08 16:54
Appandus MyVIP » Merchant » Form
How to view the form submitted by the customer ?
Visit Dashboard or Click or , Click to see the forms submitted by the customer. Or you may visit https://myvip.appandus.com.my/admin/forms .
You will see list of forms like image above. To view form's detail, click on Action column, For example, Click on form id 1 to see the detail.
Author: Administrator
Last update: 2020-07-09 03:56
Appandus MyVIP » Merchant » Enquiry
How to know how many unread enquiries ?
Visit Dashboard or Click or .
On Menu Shortcuts. You will see a red dot with number of unread enquiry shown on Enquiries button, which mean there is an unread enquiry. So to check Enquiries. Click Enquiries button to see all enquiries.
Author: Administrator
Last update: 2020-07-09 03:50
Enquiries Management User Guideline

To visit Enquiries Management. Click  on leftside menu in Dashboard.

You will be redirect to this page like image above.
Filter enquiries
Click to start filter enquiry records like what you see as image below

So here you can choose to filter enquiry record based on Sender Name / Sender Email, Sender Contact / Subject / Message / Created At / Read At.
And also you can play with Read/Unread options and Closed/Resolved options to fast filter enquiry records. For example,
To filter only already readed but not net close enquiries.
- Choose Already been read on Read/Unread and Only those not closed on Closed/Resloved.
To get only those unread enquries
- Choose Only those unread on Read/Unread.
View enquiry detail
To view enquiry, click  to view enquiry
Close enquiry
1. To close enquiry, Click 
2. On Closed At , select close date and time.
3. You can key in remark. It's optional
4. Click to submit.
Author: Administrator
Last update: 2020-07-09 04:54
Appandus MyVIP » User » Topup Credit(s)
How to online topup credit(s)
- On Merchant's homepage, Navigate to

- Press Top Up

- Choose Topup Package
- Confirm the details and Choose Payment Method. Then Press Place Order. You will redirect to make online payment.

- Once successful, You will be redirected back to the history page.
Author: Administrator
Last update: 2020-12-10 08:40
Appandus MyVIP » Merchant » Videos
How to manage Videos
You must have Appandus MyVIP Admin account. To get your Appandus MyVIP Admin account, Visit Appandus MyVIP's enquiry to write an enquiry to us.
Search for  and click
  on the video you wanted to edit. Click
  to create a video.
- Slug - will be generate itself automaticaly.
- Prioty - if you set it smaller number, it will display the video prioty on top of the list.
- Status - select published to launch your videos event.
- URL link text - you can link text for your video by inserting URL link.
- Video - Upload a video. the video resolution might be different.
You can delete the Video by pressing  on Edit mode or View mode /
  on the Action column.
There you go, manage Videos!!

Author: Administrator
Last update: 2020-12-10 02:16
How to make that videos being playing on first.
Set lowest number on Priority field  .
.
You must have Appandus MyVIP Admin account. To get your Appandus MyVIP Admin account, Visit Appandus MyVIP's enquiry to write an enquiry to us.
Author: Administrator
Last update: 2020-12-10 09:03
How to disable video reactions
You must have Appandus MyVIP Admin account. To get your Appandus MyVIP Admin account, Visit Appandus MyVIP's enquiry to write an enquiry to us.
Seach for  and click the bar to disable video reaction
  . Same goes If you want to enable video reaction, just click on the bar to switch back to
Author: Administrator
Last update: 2020-12-10 02:21
Appandus MyVIP » Merchant » Topup Pakage
How to manage Topup Package
You must have Appandus MyVIP Admin account. To get your Appandus MyVIP Admin account, Visit Appandus MyVIP's enquiry to write an enquiry to us.
Search for  in the navigation menu.
After navigate to Topup Packages main page, click if you havent create a Topup package, if you do then click 
There you go, manage Topup Package!!
You might manage content state below:
- Credit - credit amount member pay for
- Code - internal code for the package
- Valid For Days - Expire After X days of the date credits purchased
- Price - the price to pay the package
- Amount to display - show the credit amount

Hence, you can delete the Package by pressing on Edit mode or View mode / on the Action column.
Author: Administrator
Last update: 2020-12-10 02:16
How to disable tax calculation
You must have Appandus MyVIP Admin account. To get your Appandus MyVIP Admin account, Visit Appandus MyVIP's enquiry to write an enquiry to us.
Search for  and tick the Not Applicable to disable the tax calculation. Visit *How to manage Topup Package* to learn about how to create, edit and delete Topup Package.
Author: Administrator
Last update: 2020-12-10 01:50
